My girl came home last night with an assignment to make some kind of model of a cell and its organelles. And we decided to make it out of homemade Jell-o Gummies. The results were not quite as spectacular as we’d hoped, but it’s still kind of cool, the project was LOTS of fun, and I think a few tweaks would make it awesome. My friends asked for a how-to, so here you go. Just note, this process is still under development!
So I’ll post what we did, what went well, what went wrong, and what we’d do differently next time. Then if you try it, you can share your tips as well!
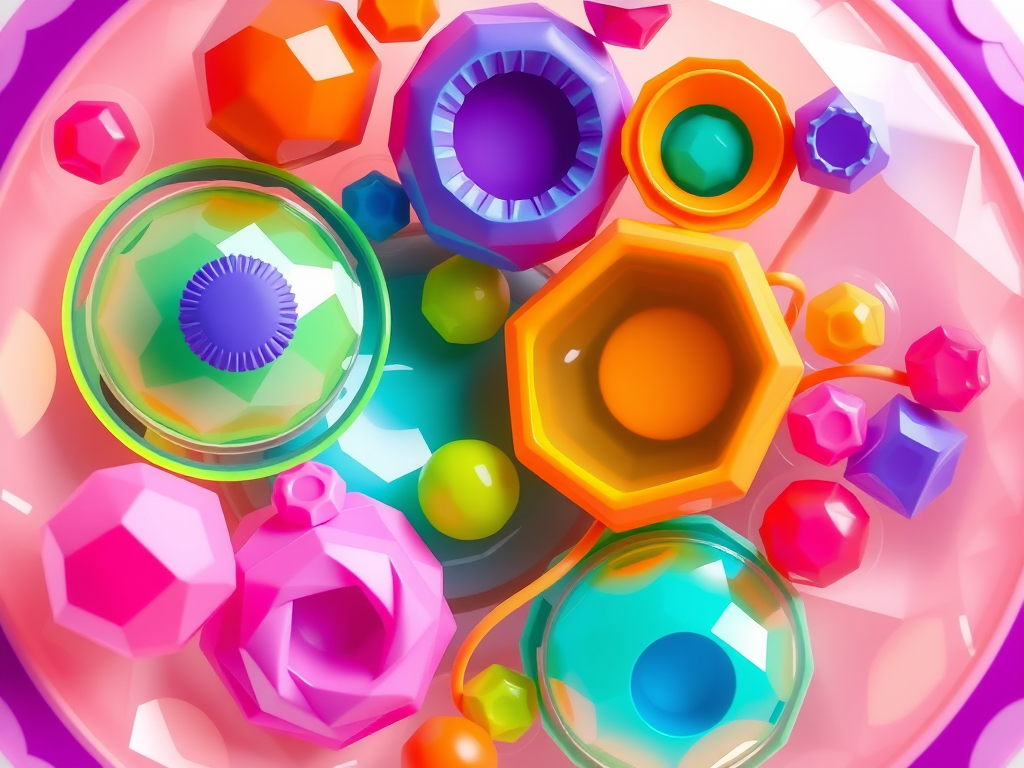
This is what ours looked like. Could use some improvement for sure, but we had enough fun with this we might try again soon:

Ingredients
1 3oz package Mango Jell-O
(Next time I would go with a lighter color or just use more unflavored gelatin and a little sugar instead, as the color was darker than we’d hoped)
4 envelopes Knox Unflavored Gelatin
1/2 cup Hot Water
1/2 cup Cold Water
1 Peach-O Ring
1 Fruit-Sour (just this round candy thing we found in the bulk foods section)
7 Fruity Tootsie Roll Midgees in 4 Colors (We used 3 green, one yellow, one orange, and one pink – different colors for easier color-coding on her key / legend)
1 blue Jolly Ranger (I would probably just use another midgee color in retrospect.)
Round Sprinkles
We also used kitchen scissors, a rolling pin, spray-on oil, a sauce pan, a whisk, and a bowl to mold our cell.
Instructions
So, for the gummy solution (aka the Cytoplasm!) stir the hot water and gelatin in sauce pan. Heat it up very slowly on medium-low heat, stirring now and then, until the gelatin is fully dissolved. You don’t want a lot of bubbles, so don’t boil this a lot or anything.
Meanwhile: spray your mold with oil, or use some oil on a paper towel so your gummy won’t stick. Put your mold in the fridge so it will be nice and cold.
Put the fruit sour in the middle of the Peach-O. This is a Nucleus and Nucleoli.
Cut the yellow midgee in four pieces. Roll each piece into a ball. These are Lysosomes.
If your gelatin is ready, add the cool water and stir it in gently but thoroughly. Skim off and throw out any foam that’s formed. Add a little to the bottom of the mold, swish it around a little to get some on the sides, and put it in the freezer for a moment to thicken up. We didn’t do this, and our organelles fell right to the bottom, which was not as awesome for a gummy effect since we didn’t have a good “Cell Membrane.”
Make several cuts (not all the way through) across each of the green midgees, then cut again from the other direction. Our cuts were diagonal, but if we were to do it again, we’d make them straight. Squish each one back together again, leaving the cut lines in place. These are the Mitochondria.
Roll the pink midgee with the rolling pin. Cut it in half the long way. Stick the two ends together to make a long strip. Roll it some more, then cut it length-wise again, stinking these two longer strips together. Fold this back and forth a bit. This is the Golgi Apparatus.
Follow the same steps with the orange midgee, only fold it up an little more randomly, and you’ll need to fray up one end of it and stick it in some candy sprinkles. This is the Rough and Smooth Endoplasmic Reticulum.
Save a few more sprinkles for Ribosomes here and there.
For the Vacuoles, we broke up a piece of blue jolly ranger and baked very briefly — just long enough for it to melt into little “bubbles.” In fact, while they were still pliable but not hot to the touch, we were able to shape some to make them a little more 3D. Be careful about the littles if you do that. Then let them cool.
Now. This is where we went wrong. Our gelatin was not quite set enough when we started adding organelles. It was too wet, and our organelles kind of bled into it a bit. Plus, like I said earlier, they kind of floated to the bottom, so our gummy has parts that would fall out. Not as neat. We’d redo if it weren’t a busy night tonight.
So add a little more gelatin to your bowl and let it set briefly (maybe 2 minutes in the freezer) before placing the organelles. Maybe refrigerating the organelles would help too? Or add your gel in layers so it doesn’t all sink to the bottom of the bowl. Honestly, let me know what worked for you. And don’t forget to add more sprinkled-in ribosomes!
Then finish setting it in the fridge.
When it’s all set up (and that happens fairly quickly because this a very thick gummy recipe) you should be able to handle the cell with clean hands. We decided to leave ours in the bowl because our “cell membrane” (or that first layer of Jell-o) wasn’t thick enough to protect our organelles.
So — there you go! We might try it again with our modifications and update this post. Or we might try totally different candy and use two or three smaller molds.
If you try it, let me know how it goes! And in the meantime, enjoy this rap:

Leave a comment